
The store ones are so thin and pretty much useless. You could just get the plain diapers, but I think adding the flannel makes them cuter and also adds another layer of absorbency. These are pretty basic so I feel a little silly writing a tutorial, but hey we all start somewhere, right?

So here goes… Embellished Diaper Burp Cloth Tutorial
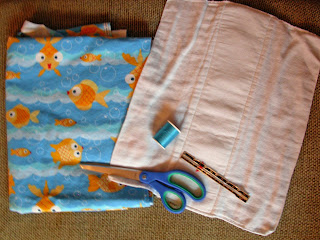
1) Gather your materials and prewash/dry fabrics and diapers in case there is any shrinkage.
· White “diaper service quality” prefold diapers (available at Target or other –Mart, ironically these suck as actual diapers. LOL)
· Cotton Flannel in a cute print (1/4 yard will make two with a couple inches to spare)
· Thread in contrasting color and white
· Ruler
· Iron
· Sewing Machine

2) Cut! Cut your flannel into strips about 7” wide and as long as your diapers + 1”. We are going for a ½” hem allowance and a 6” wide strip on our finished product. If you are making a bunch of these you can make a basic pattern out of paper and use that to cut out all your strips.

3) Press! Fold 3 edges under ½” to the wrong side of the fabric and iron. Leave one of the short ends as it is. I usually just turn that one under as I’m sewing since the diapers aren’t really a straight edge. I like using my hem ruler because it is 6” and I can make sure that the strip is an even width that way.
 4) Pin! Center the fabric strip on the diaper and pin in place. Pin well so that the fabric doesn’t shift around too much while you are stitching.
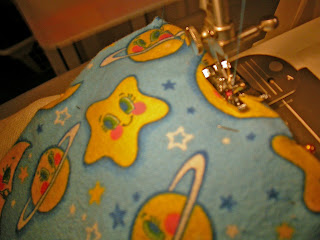
5) Sew! I like to start on the short end that I pressed under and then work my way down one of the long sides. Just sew close to the edge in a straight line. I usually line up the edge of the flannel with the edge of the pressure foot. I turn under the other short side as I go, and finish up the final long side. I also like playing around with the fancy stitches on my machine, but a plain zig-zag looks just as nice. I use a contrasting thread on the top and a white thread in my bobbin so it doesn't show so much on the backside. This also makes it easy if are using a bunch of different patterns since you don't have to mess with changing out the bobbin thread.
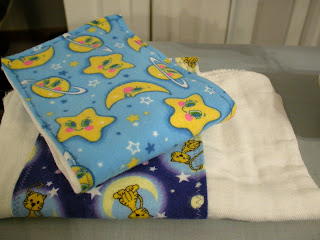
6) Gift! Tie up a stack of these for a nice little baby gift. These cost me under $2 each for materials so a set of three would be a nice little something to gift. JoAnns has so many fun flannel prints. You can think outside the "baby" box and pick prints that suit mom, like coffee or mod florals.


2 comments:
This is great, I've been looking for a tutorial that I can "get".
Thanks!
Those look so soft! Great idea!
Post a Comment