Photo Sharing and Video Hosting at Photobucket
Showing posts with label baby/kids. Show all posts

Saturday, April 19, 2008

Baby Sweater Update

Proving that Starfish is the sweetest knitting on-line friend I have, she offered to fix my sad sweater.

However, I think that I may have overreacted a bit. I guess that will teach me to make decisions when it's 2am and I'm a bit out of it.

The sweater looked better to me the next morning (the day of the shower) so I finished it and gifted it. I still am not confident that it will fit an actual baby correctly, but everyone ooohhed and aaahhed over it anyway.


DSCN8637


My favorite part is the little eyelet detail on the back.

Despite my frustrations, I think I will try this again. I am determined to make it look more like the picture next time. :)

Monday, February 18, 2008

Tu-Tu Easy!


I made this tu-tu for a darlin' girl's first bday gift. It was easy and fun to make. I'll put up a little tutorial soon so you all can make one too. It could even be no-sew if you like.


Doesn't she look so cute?!

Saturday, December 29, 2007

slingin' it

I've been a big fan of "baby wearing" since Peanut was about 6mo old when I realized I could have a happy baby AND my arms back to myself.
My on-line friend made me a comfy Mei Tai (Asian-style carrier) and also a soft wrap (sorta like this). This summer I won a sweet sling from here and realized I really like the versatility that a ring-sling has. I really wanted a silk one but the $$$ price tag was prohibitive. They look simple enough to make so here I am! I ordered this fabric and a set of these. I have my directions from Jan's site.

(ETA: I used the Medium sized Aluminum rings in silver.)

Stay tuned for the outcome! Has anyone else out there attempted sewing their own baby carrier?

Thursday, December 27, 2007

Ta-da!

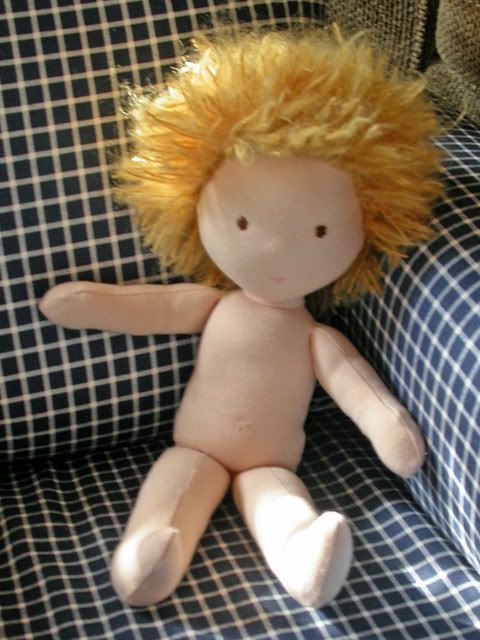
finished waldorf boy doll
As promised, here is the doll with clothes. I cut up some old shirts to make them. I think I rushed them a bit because the sleeves are too long. Oh well. I don't think Peanut noticed. I hope everyone had a fabulous Christmas. I'll be posting some pics of our celebrations over at Mama K NJ.


Once again, doll kit (pattern+materials) came from http://www.dancingraindolls.com/


Oh and look what I got for Christmas....

Don't mind the bad pic of me... look on my lap. It's Bend The Rules Sewing! yay!

Thursday, December 20, 2007

I Did It!

Well here he is! He's just missing something... oh yeah ... clothes! te-hee
I don't particularly enjoy making people clothes so I'm hoping doll clothes aren't too bad.

He was surprisingly easy to make, but a bit time consuming to get everything just right. He is far from perfect, but I'm pleased with the result.
A few notes for next time:
*Make the nose a little bigger than you want the finished result to be. When you pull the "skin" over it, the nose will flatten a bit.
*When doing the inner head form, be sure to tie the string as tight as possible. Again, once I pulled the fabric over I lost some of the definition.
*Ditto on the thumb. Make it more exaggerated than you think or it won't show up at all.
*Make sure you stuff stuff stuff as much as you can with the wool. It compresses and you want a full doll. (I am used to polyfil which is a completely different animal.)

Wednesday, December 19, 2007

Easy Baby Burpcloth / Burpie Tutorial

A made a few of these burp cloths for my friend’s shower. Well she had the baby and he’s a spitter-upper. She liked the burpies so much she asked where she could buy more. What a compliment, right? So I made her a few more and figured I’d share the super easy method with you all.

The store ones are so thin and pretty much useless. You could just get the plain diapers, but I think adding the flannel makes them cuter and also adds another layer of absorbency. These are pretty basic so I feel a little silly writing a tutorial, but hey we all start somewhere, right?


baby boy burp cloths
So here goes… Embellished Diaper Burp Cloth Tutorial
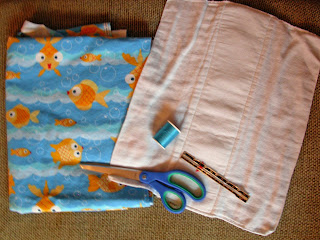
burp cloth materials

1) Gather your materials and prewash/dry fabrics and diapers in case there is any shrinkage.
· White “diaper service quality” prefold diapers (available at Target or other –Mart, ironically these suck as actual diapers. LOL)
· Cotton Flannel in a cute print (1/4 yard will make two with a couple inches to spare)
· Thread in contrasting color and white
· Ruler
· Iron
· Sewing Machine


cutting the fabric

2) Cut! Cut your flannel into strips about 7” wide and as long as your diapers + 1”. We are going for a ½” hem allowance and a 6” wide strip on our finished product. If you are making a bunch of these you can make a basic pattern out of paper and use that to cut out all your strips.


press under the edges

3) Press! Fold 3 edges under ½” to the wrong side of the fabric and iron. Leave one of the short ends as it is. I usually just turn that one under as I’m sewing since the diapers aren’t really a straight edge. I like using my hem ruler because it is 6” and I can make sure that the strip is an even width that way.


pin the fabric4) Pin! Center the fabric strip on the diaper and pin in place. Pin well so that the fabric doesn’t shift around too much while you are stitching.
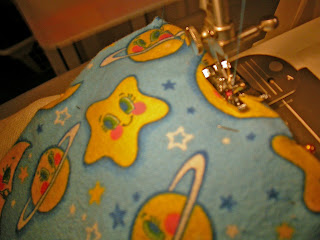

sewing the burpies
5) Sew! I like to start on the short end that I pressed under and then work my way down one of the long sides. Just sew close to the edge in a straight line. I usually line up the edge of the flannel with the edge of the pressure foot. I turn under the other short side as I go, and finish up the final long side. I also like playing around with the fancy stitches on my machine, but a plain zig-zag looks just as nice. I use a contrasting thread on the top and a white thread in my bobbin so it doesn't show so much on the backside. This also makes it easy if are using a bunch of different patterns since you don't have to mess with changing out the bobbin thread.
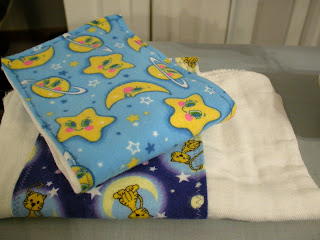


ta-da!
6) Gift! Tie up a stack of these for a nice little baby gift. These cost me under $2 each for materials so a set of three would be a nice little something to gift. JoAnns has so many fun flannel prints. You can think outside the "baby" box and pick prints that suit mom, like coffee or mod florals.

Sunday, December 16, 2007

Waldorf Doll In Progress

Waldorf Boy Doll
Ok, so I felt bad after posting that I might not get to the Peanut's xmas doll. I ordered him a rocking horse as his big gift, but I am now doubting it will get to me in time. (Long story.) Anyway, this was my other main gift I had planned and that would be pretty lame if I flaked out on that one too!

I snapped this pic Saturday night. Not bad for one day's progress, right?

He now has hair but needs a hair cut.... latching that hair in took FOR-EV-ER! This week I'll be adding on his arms and making him an outfit.
Doll Kit from Dancing Rain Dolls

Friday, November 16, 2007

Handmade Toys

felted wool sandwhich Some xmas gifties for my Dear Son. I made the "bread" from recycled, felted sweater leftover from making wool pants (aka longies). I just slip stitched two pieces together. Inside is cheese and deli meat just cut from more felted sweaters. I think they are quite cute. Oh yeah, and lead-free too. :)

felted wool play food
I have seen eggs and all other kinds of cute food fashioned from felt or even knit or crocheted. I think DS needs a play banana next.

Saturday, October 20, 2007

more gifties

Over a month between posts? How do I do it? lol

Ok so here are some gifties for my friend's baby's Christening. I also put in a book of Bible stories for the kiddo when he gets older.
Check out my NEW EMBROIDERY MACHINE SKILLS! Since this is my first go round I put the name on a little patch and hand sewed that to the blanket. I didn't want to screw up the large piece of Minkee by accident.

I started the turtle as a welcome-to-the-world gift, but since I didn't finish it until it was time for the Christening I put it in there. And seriously, I couldn't have planned the colors matching any better than they did.

Enjoy baby D! Made with love by your (fake) Aunt K.

Tuesday, August 21, 2007

Kool-Aid Dying Playsilks Tutorial

First off, I never knew Kool-Aid was hyphenated. Koolade? Koolaid? Nope Kool-Aid! LOL

Why dye with Kool-Aid? Well, first off it's food grade so it's non-toxic. You can use your regular pots and utensils when using it. Also, you don't need any special chemicals. Just some unsweetened drink mix, vinegar and water. Kool-Aid is in the category of acid dyes. Acid dyes work well on protein fibers like silk and wool. You use heat to set the dye and make it permanent.

Acid dyes do NOT work well on cotton. For cotton you need fiber reactive dyes and soda ash.

Today it was rainy and Peanut was napping so I decided to try my hand at dying some playsilks. I think this would be a fun project to do with older kiddos.
I still need to do some cottons this week, but that is a much more involved process.

Another side note, if you don't know what playsilks are click over here.

Without further ado, here's a little tutorial for ya!

Materials:
Big Pot
Jars (Mason or clean tomato sauce jars work nicely)
Kool-Aid or other unsweetened drink mix (4-5 packets per scarf)
Distilled White Vinegar (for some extra acidity)
Plastic Spoon
Playsilks
(I got the 35x35" size silk scarves from http://www.dharmatrading.com/)

Step 1:

Soak scarves with warm tap water and a glug of vinegar while you mix up the dyes.


Put about 1 1/2 cups of hot tap water in each jar. Add 4-5 packets of drink mix and a splash of vinegar (about 1Tbs). Add more mix for darker colors, or less for lighter colors. Put the lids on and shake to dissolve the mix.


Step 2:

Put a few inches of water in the pot. Place the jars in the pot on the stove and bring to a slow simmer. You don't want it to get all crazy and splashy.


Step 3:

Put one silk scarf in each jar and squish it around with a plastic spoon.

Step 4:

Continue heating and squishing the scarves around in the jars until all the dye is absorbed. The water will turn almost clear or a milky color when the dye is set. This will happen quickly for some colors or take longer for others. The scarves sucked up the green really fast, but the red gave me some trouble.


Step 5:

Rinse in cold water and hang to dry. If the dye is absorbed into the silk you will only have to rinse once.


MY NOTES:
This is not an exact science. Some colors seem to take better than others. The red/Fruit Punch took me forever to absorb. I think I could have used much less dye than I did. I actually winded up changing the water and reheating it again after rinsing it out once. I searched around a bit on the web and found that most people have some issues with the red not taking all the way.
When I dyed wool yarn, purple/grape seemed to separate and dye very unevenly but I've seen some pretty purple playsilks on the web. There seems to be alot of hit or miss on the flavors, but that's part of the fun!

Also, if you have more liquid, your color will be more even. The less liquid, the more marbled effect you will get. For the most uniform color you should kettle dye them in a big pot so you can stir them around frequently. Personally, I'm diggin' the marbled effect.
Obviously there is some trial and error involved.
It's still fun though and I think Peanut will enjoy the playsilks. I haven't tried washing them yet, but I think I'll stick with hand washing if needed.

For further info on the art of Kool-Aid dying:

.
.
.
.
Has anyone tried this? How did it work for you?
.
ETA Found instructions on using cake dyes! I think that's next on my list.

Monday, August 06, 2007

Baby Shower Recap: Diaper Cake and a Mama Basket

My dear friend S's baby shower was Saturday. It went so nicely and dare I say CUTE. We went with her nursery theme and decorated in beige, cream and white with lambs and star accents.

For the "wishing well" I decorated a laundry hamper with tulle and a garland of wooden stars, a moon and clouds. The wooden shapes are available at the craft store. I painted them and hot glued them to a matching 1/4" ribbon. I am kicking myself because I forgot to take a picture.

My super talented friend, kitten.mom, painted some other wooden decorations and made little cotton ball covered lambs. She even stitched the little faces!


I love that the mama-to-be can take the decorations home and use them in the nursery.

I couldn't resist making a diaper cake! I went simple and elegant with the design this time. Two colors of ribbons and topped with a plush lamb. (Click to this post for links on how to make your own diaper cake.)

And for my gifty, I made up another mama basket. (Click for ideas on making your own.) I think it's my best looking one yet. Can you spot the burpies? The basket was half price at AC Moore and the shred was from the dollar store. Seriously, the wrapping cost as much as a nice gift bag. Not to mention you just can't have enough baskets for blankets, toys, diapers, etc. I was even lucky enough to find a lamb baby shower card at Walmart! Score!


Next post I'll give you the low-down on the crochet lamby toy.

Click over to my main blog to see a pic of the cake S's mom ordered. It matched everything PERFECTLY!

Thursday, August 02, 2007

Cute Baby Burp Cloths

cute baby burp cloths
I made these for my friend. The shower is Saturday so I doubt she will be on here before then. They are Gerber prefolds topped with yummy, soft flannel prints. I got fancy and used a different topstitch on each one. They are the perfect addition to my gift basket!

Friday, July 27, 2007

Travel Wipes Case

Have you seen those swanky disposable wipes cases?

I thought they were cute, but hardly a "necessity."

My friend Deb sent me this tutorial. For a few bucks worth of supplies you can make your own custom case. If you are a hard-core crafter I bet you have all the supplies on hand. Sweet!

Here is my finished result:
I love it! So much cuter than pulling out that Pampers or Huggies stamped plastic.

My tips -- Little scissors make it easier to trim down the excess fabric. If you use low temp glue, glue and stick in sections or the glue will cool too fast and your finished product won't be quite as smooth. If you use high temp glue watch those fingers!!

If you decide to make this, let me know! I want to see the results.

Tuesday, July 11, 2006

Finally Finished Object


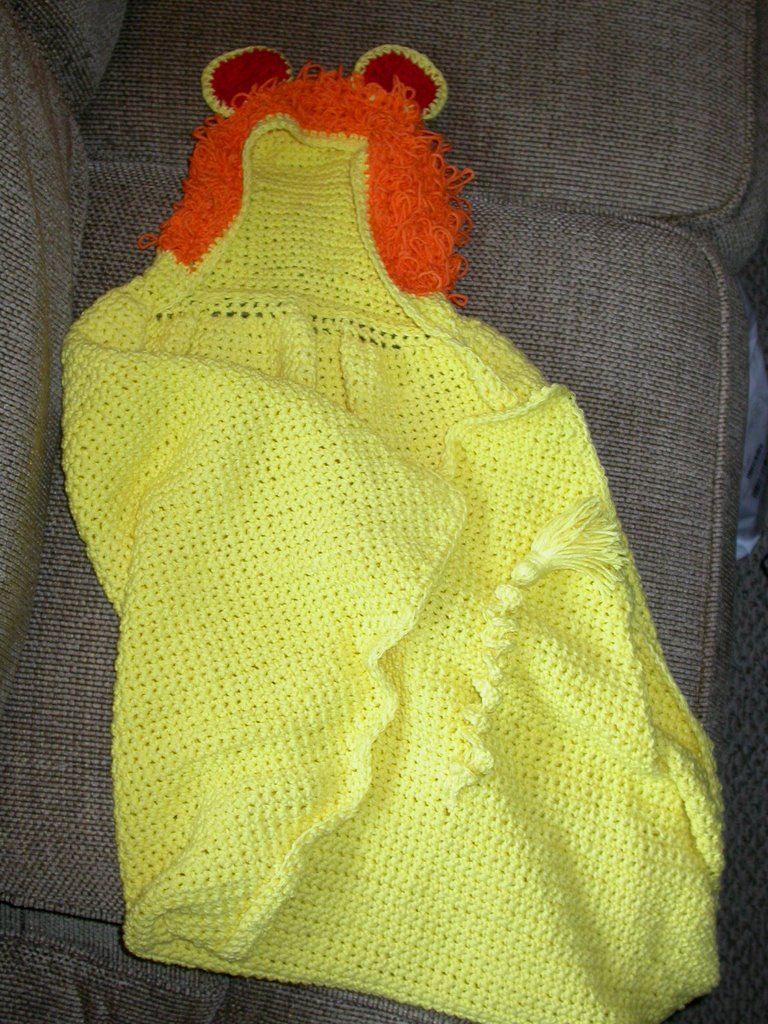
So it turned out ok. However, I hated making this and kept putting off finishing it. I'm not sure I did the mane right as it seems very loose. I didn't check my gauge and it seems really, really long too for a little kid. I used the Lion Bath Wrap pattern, but used some yellow kitchen cotton I had gotten on sale. It took unnumerable balls of yellow yarn and just a bit of the other colors.

Friday, June 30, 2006

Call me Granny!

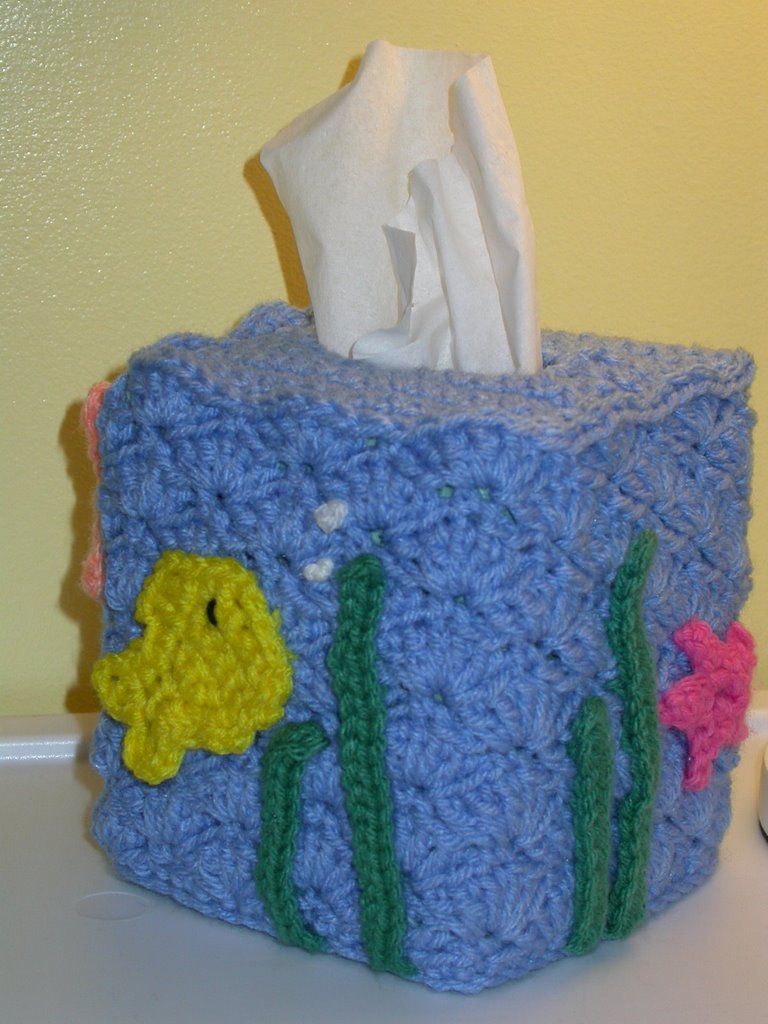
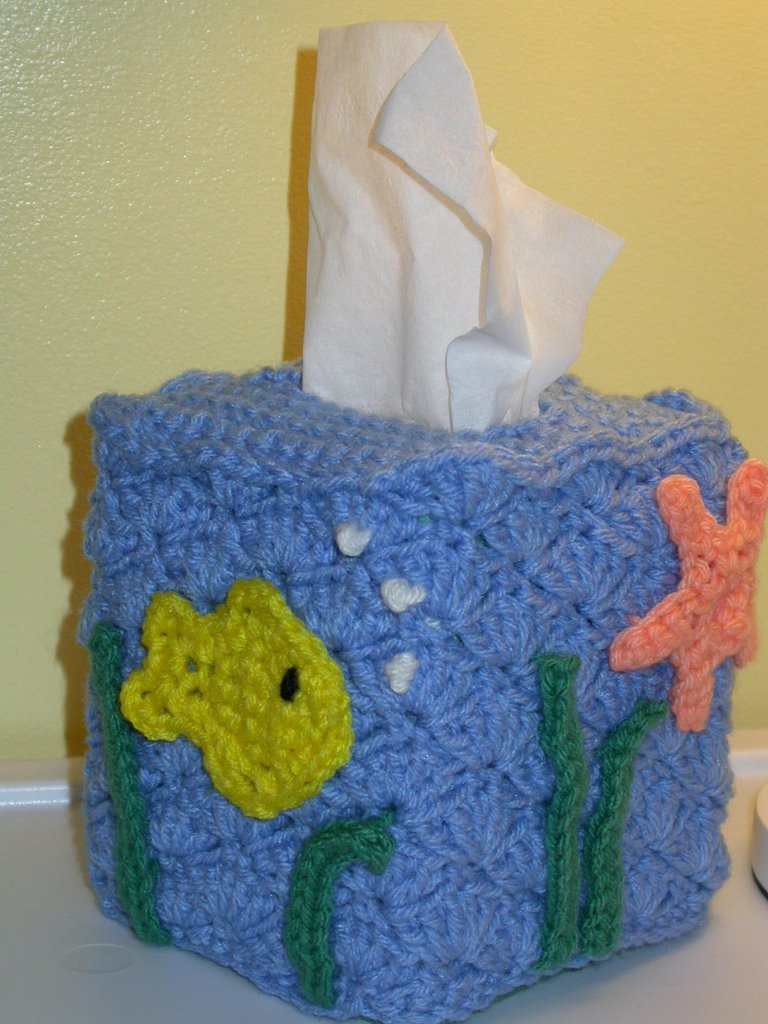
There are several "granny projects" that always make me laugh. They are spare toilet paper covers, tissue box covers and basically anything that involves a plastic doll. My grandma stilll has these items in her house in 70's gold, brown and avocado. Annie's Attic pattern of the day awhile ago was a fishy tp cover. It inspired me to try and make a similar tissue box cover to match my "sea creatures" nursery. Here's the finished product:


The background is a basic shell pattern and the top is sc. The fish I copied from the Annie's Attic pattern. The starfish I made up myself and the seaweed is just slip-stitch across a chain. All were made in Red Heart leftovers.

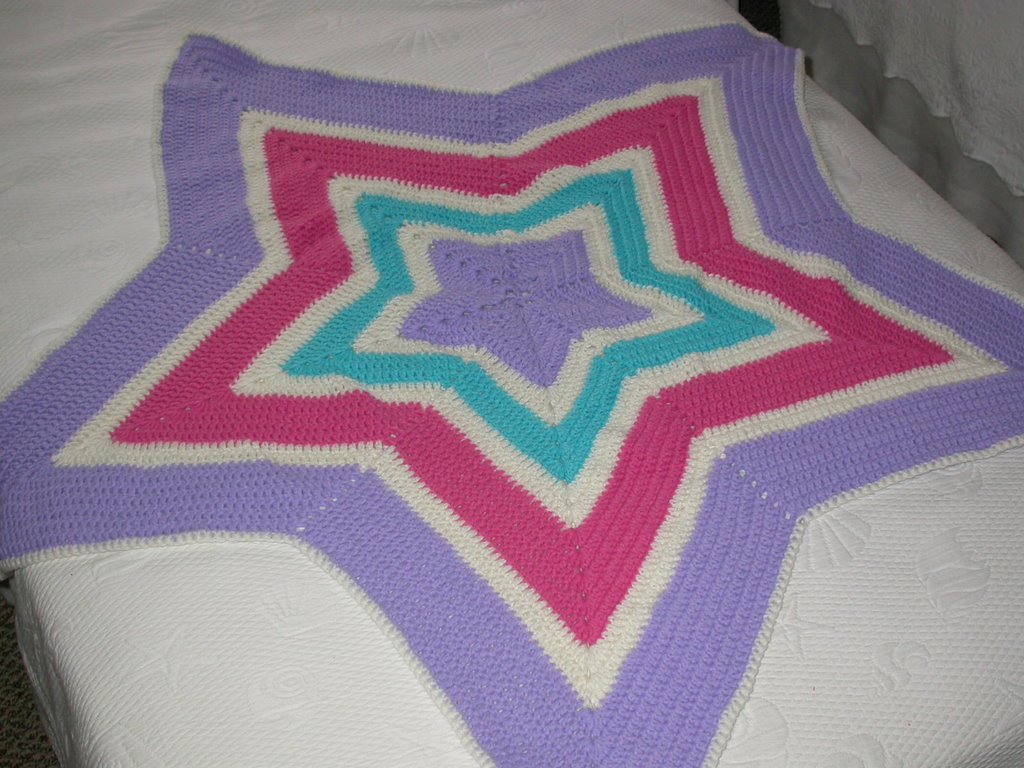
Star Blankie

Here is the star blankie I made for my friend's baby girl. I wanted to do something a little different from the traditional pastels.
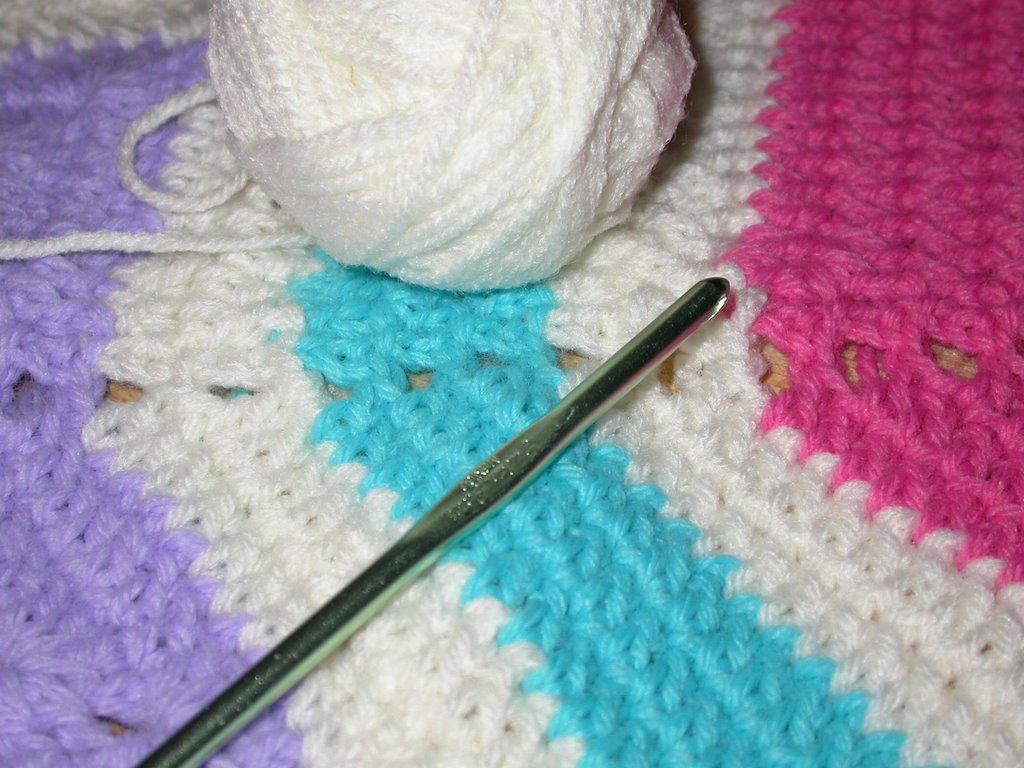
I used Beth's Little Star Afghan pattern to get me started. I found the beginning very hard to figure out and I had to re-do it many times before I finally got it right. Once it gets going, it's only dc. I'm thinking about making a little stuffed animal to match.
BTW, I used Lion Brand Pound of Love. Not the softest, but durable and I had it in my stash already.
I think it is quite cute!

Tuesday, June 27, 2006

I'm back!

A friend had a new baby a couple of weeks ago. Inspired to make her a gift, I dug into my stash and started out Sunday. I'm about 70% done. Here is a preview.

Wednesday, June 21, 2006

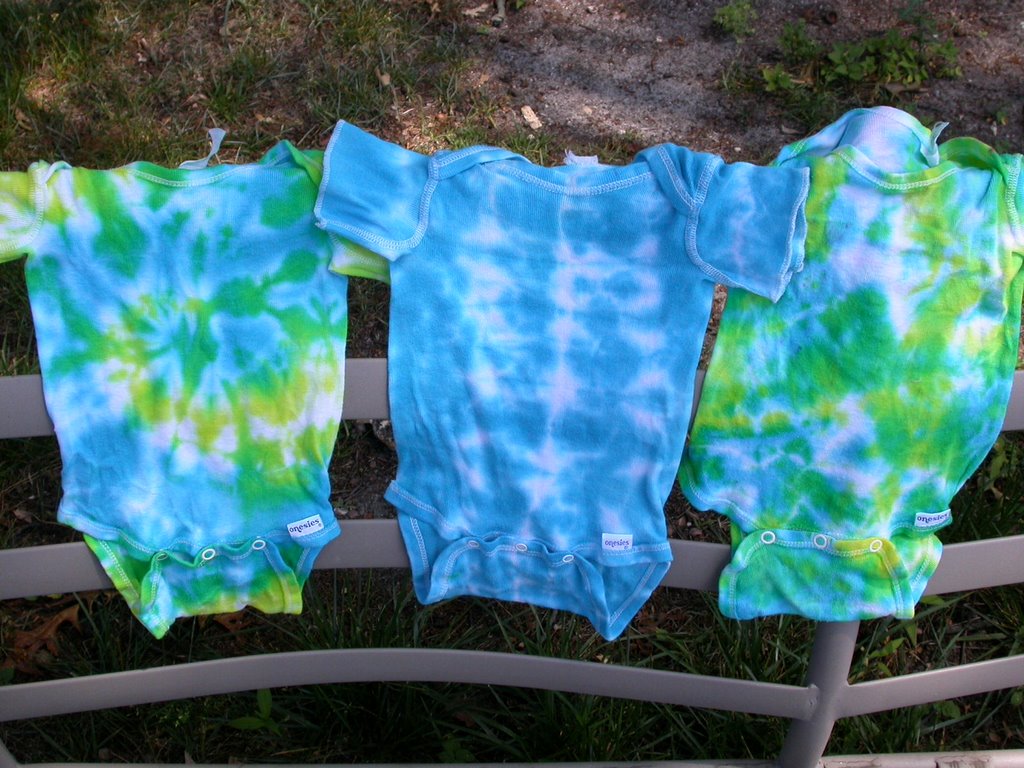
OT: Tie-dyed Onesies

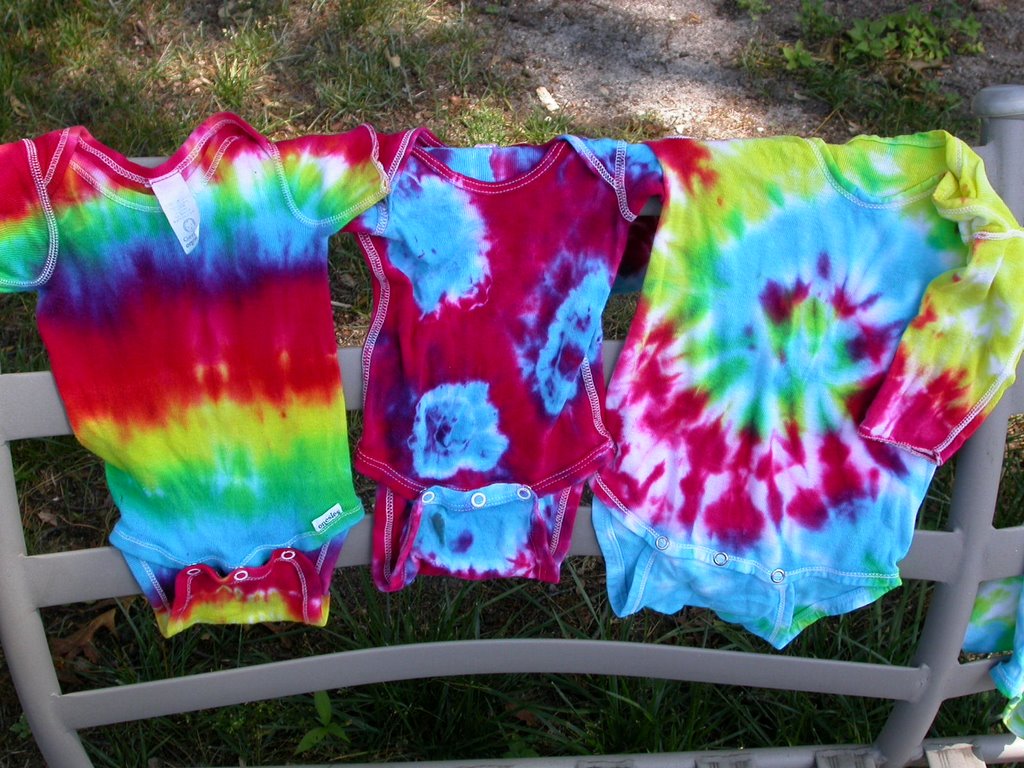
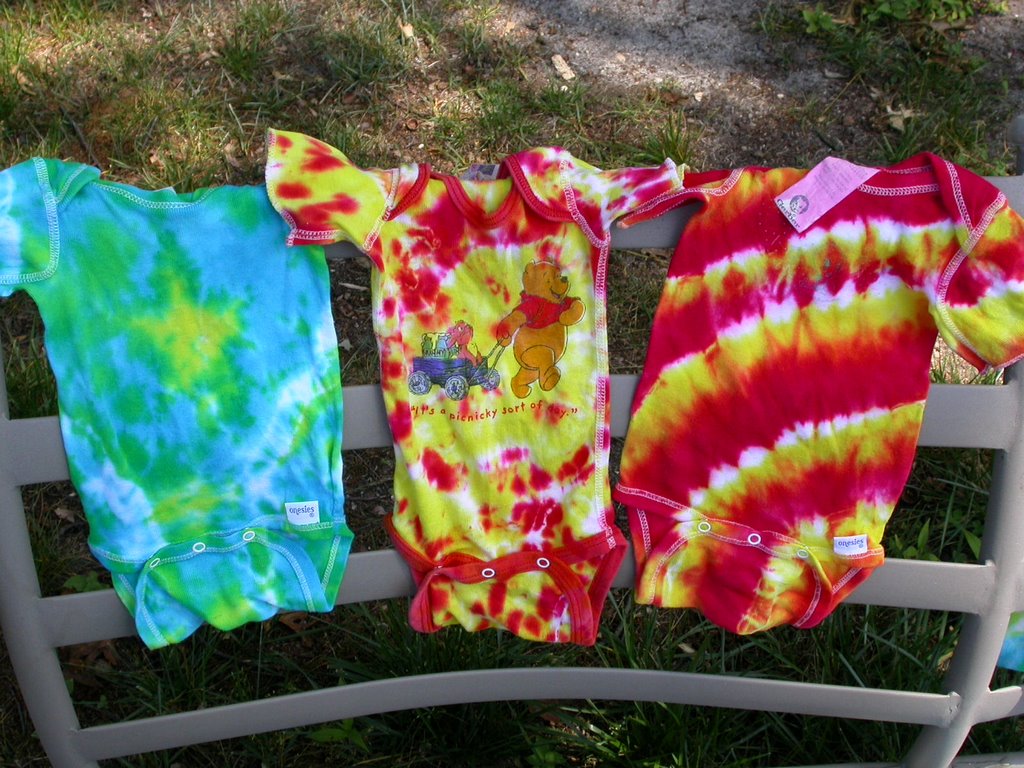
So I inherited some old baby clothes. I tried to brighten/take out old stains w/ an overnight soak and some of the bright colors bled. So I got the idea to tie-die the onesies. I got the Groovy Tie-dye kit that was on sale at ACMoore this week and here are my results. I think I'm going to go back and get a couple more kits to save for later. (Click on the pictures to see a bigger picture for details.)

1) Rainbow Vertical Pleats


2) Random blue circles w/ fushia background

3) Rainbow Spiral Fold


1) Supposed to be a star in the middle, but I think it would have worked better if I made it bigger.

2) Random folds and sprinkles of yellow and fushia

3) I really like the diagonal stripes, but there is a tweety bird print on it that kinda ruins the effect

1) Spiral fold w/ yellow & blue dye

2) Pale blue onesies w/ horizontal pleats and blue dye

3) Bunched in a ball and used to soak up excess dye at my green/blue station then saturated w/ left over yellow and blue dye


Not bad considering I haven't tie-dyed since I was a kid and that was w/ Rit dye and a bucket. These had the squirt bottles. Fun!

Sunday, May 14, 2006

Baby Gifts

I had my first baby shower yesterday. Click here to see the fabulous cake my friend Dirkey made me.

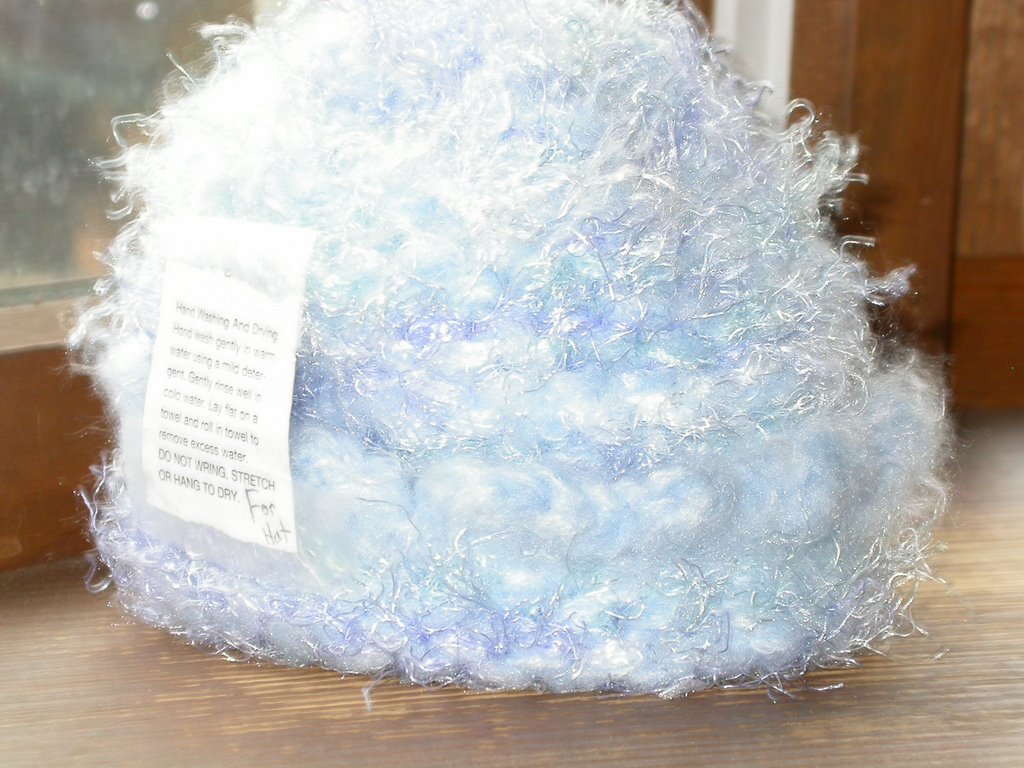
Some of my knitting girls from church were there. The one girl made me this adorable baby hat. She even taped on washing instructions! How cute is that?


My other friend made me this cute blankie. I think it will make a nice nursing shawl or "tummy time" mat. I didn't even know she could crochet. We will have to get together and craft sometime.
I love getting (and giving) homemade gifts. I either give away or sell most of my projects; I don't keep very many projects for myself. (And usually they are the "rejects" that aren't quite perfect enough to sell.) So it is extra nice when someone takes the time to make something just for me.
Personally, I am majorly slacking in the crafting dept. My silly lion wrap is just missing the ears and tail! I will have to make a point to finish it tonight. I go for a 3 hour glucose screening tomorrow. I will have to find a good project to bring with me while I sit in the lab. Finish a UFO? or start something new and exciting? decisions, descisons....

Sunday, April 16, 2006

Ta-dah!!!

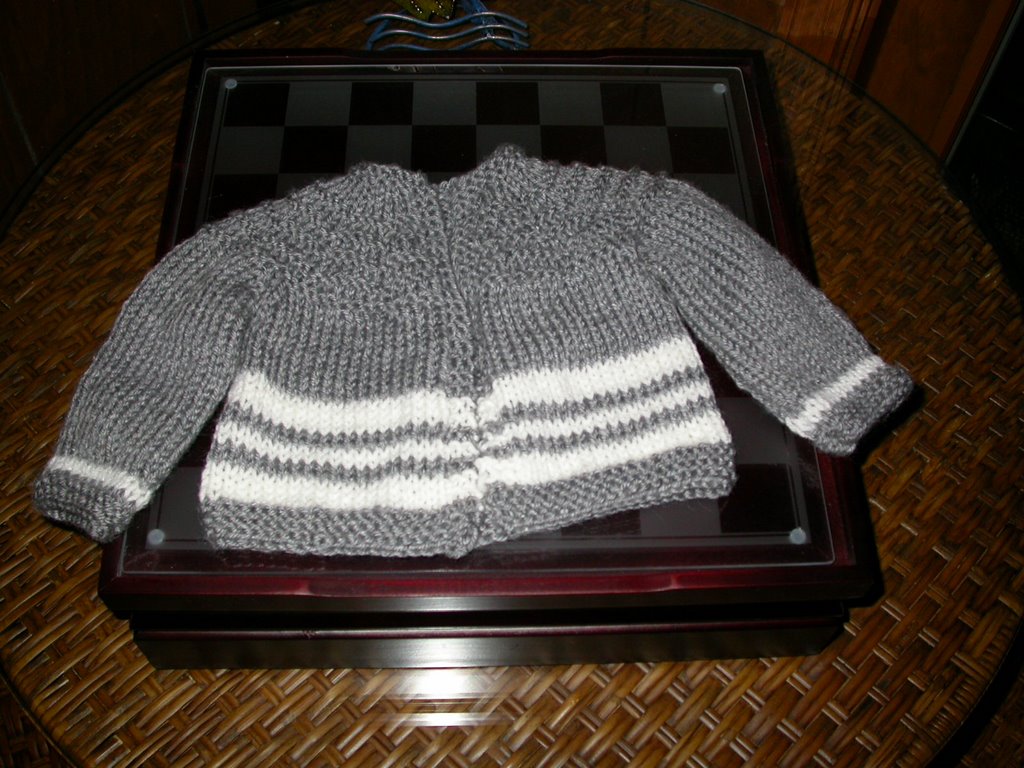
I am so freaking proud of myself! I actually knit a sweater. And it actually resembles something someone would put on their child. I couldn't have done it without www.knittinghelp.com, where I learned how to make increases and decipher the pattern. It didn't take me too long either, about a few days working on it a few hours a day. I made it with Caron Simply Soft that I had in my stash and some scrap Red Heart for the stripes. I am a beginner that has only recently graduated from scarves, so I think those more experienced knitters could bang it out pretty fast. Oh and here is the 5 hour baby sweater pattern for a boy. The original pattern is a little more girly.